Adding a Facility (video)
Important Note:
The number of facilities you can add depends on the subscription you have chosen. Once the limit has been reached, then you cannot add any more facilities.
Add Facility
To add a facility, click on the New button.
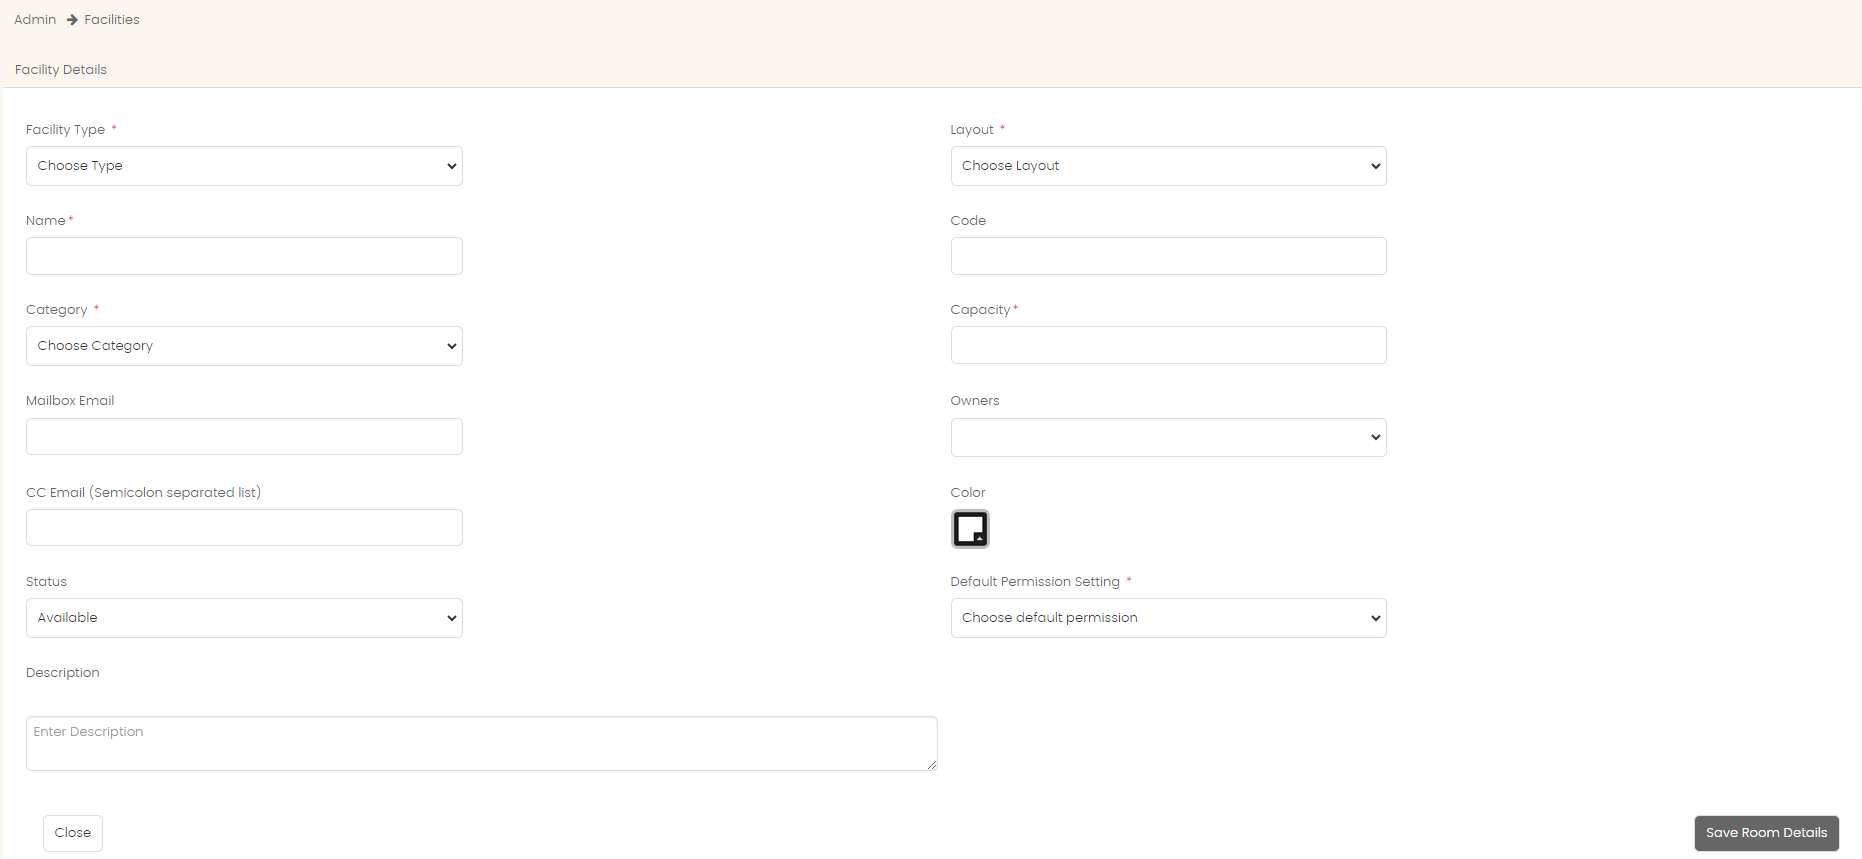
Choose if this facility is a room or desk in the Facility Type field.
Provide a name of the facility in the Name field. This should be unique.
Optionall, enter the code of the facility in the Code field.
Select the layout in which the facility is residing in the Layout field.
Select the category of the facility in the Category field.
Enter the capacity of the facility in the Capacity field. This field will only accept numbers.
Enter the resource mailbox in the Mailbox Email field. This is only needed if the facility has a corresponding mail box in office 365, google suite or exchange. If not, leave it blank.
If this is a controlled room choose the owner group from the Owner Group field.
Keeping everyone informed just got easier! Administrators can now add a list of CC email addresses to each facility, to ensure everyone who needs to know stays informed about confirmed bookings in your workspace. There can be more than one email separated by a semi-colon.
Choose Available from the Status field.
Choose the color of the facility from the Color field.
From the Default Permission Setting, choose whether all users can or cannot book the facility.
Optionally, enter a description for the facility.
Once done, click on Save Room Details.
Once the facility has been saved, the other tabs will open up. You MUST complete the other tabs to commence the booking process.
Amenities Tab
Navigate to the Amenities tab.
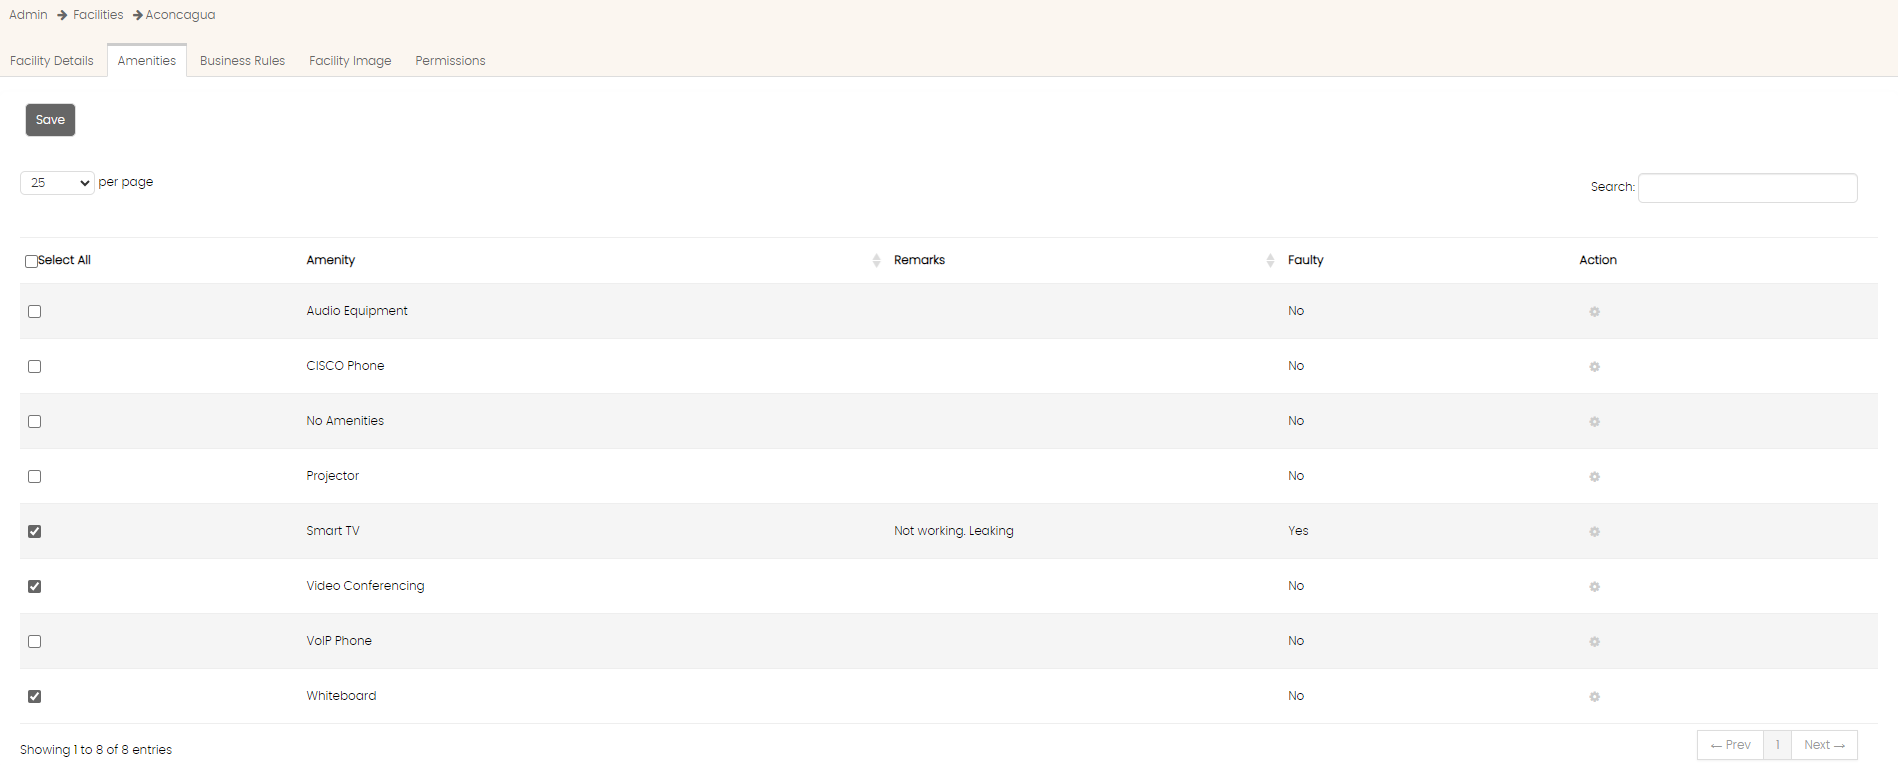
Choose the amenities for this facility and click on the Save button.
Business Rules
Navigate to the business rules tab.
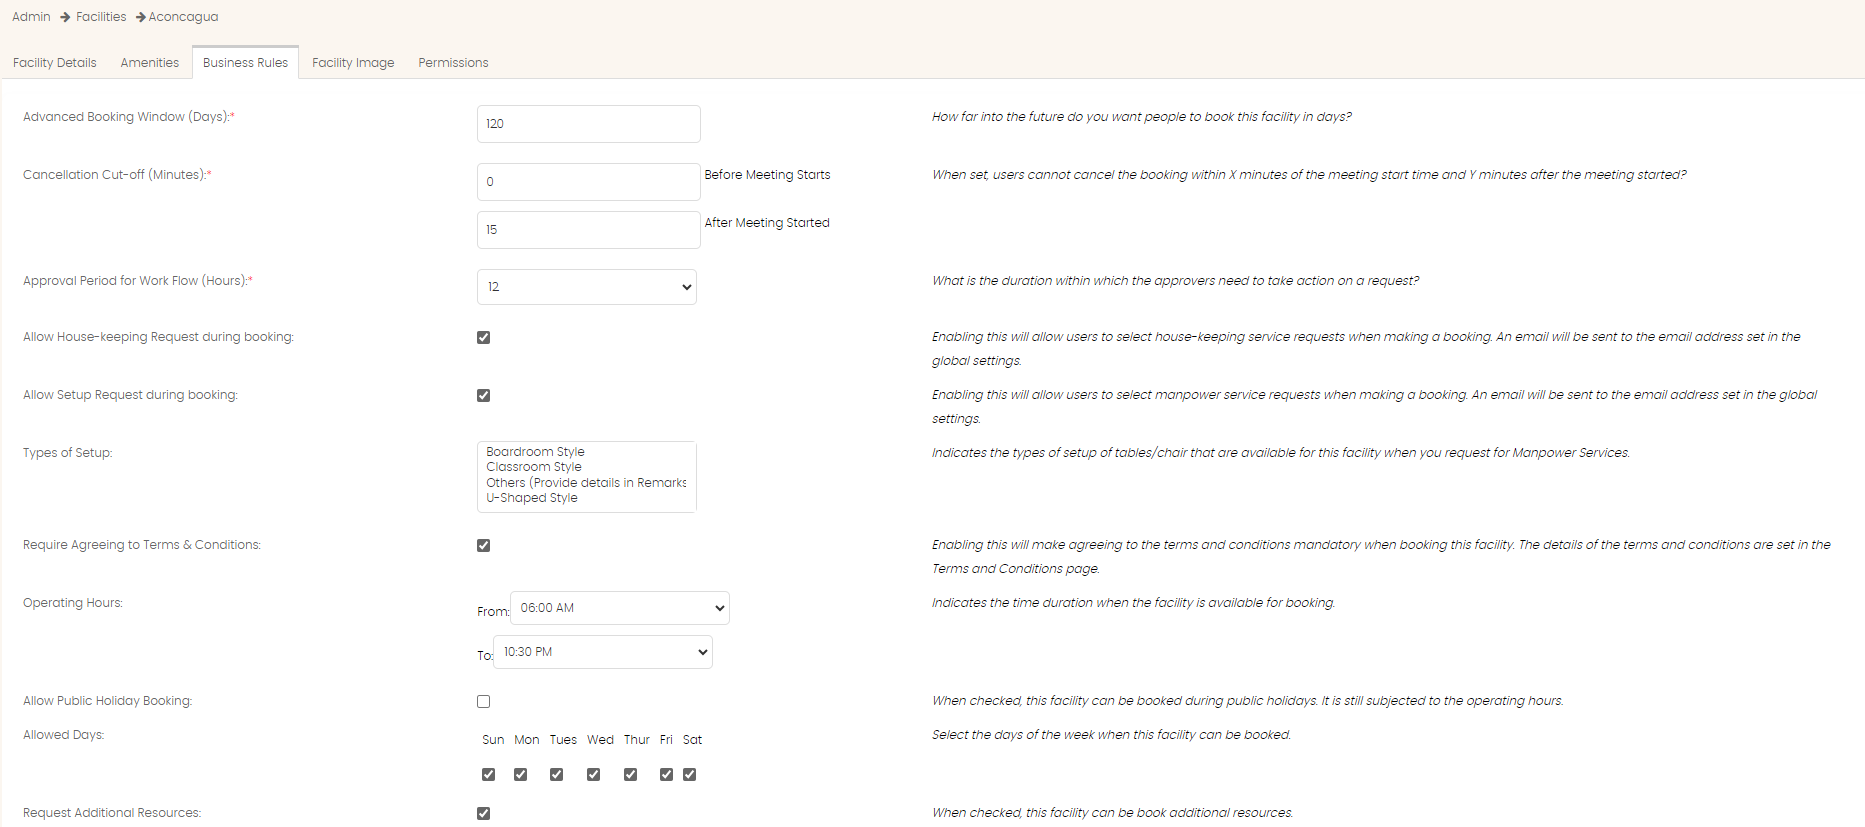

Key in the number of days in the Advance Booking Window (Days) field.
Key in the number of minutes for Cancellation Cut-off (Minutes) for Before and After the meeting starts. This parameter is disabled if set to zero.
Choose the approval duration from the Approval Period for Workflow (Hours) field.
Indicate if you allow house keeping services by checking the Allow House-Keeping Request During Booking field.
Indicate if you allow setup by checking the Allow Setup Request During Booking field.
If this field is enabled, then you must select the options from the Types of Setup list box. To select multiple options, press the CTRL key while using the mouse to select multiple rows.
If you require the user to agree to the terms and conditions, select the Require Agreeing to Terms and Conditions option.
Choose the operating hours using the From and To drop down list.
Indicate if booking is allows in public holiday using the Allows Public Holiday Booking option.
Use the checkbox to select the days of the week when the facility can be booked.
Enter the number of Days or Hours of lead time using the Booking Lead Time field. This parameter is disabled if set to zero.
Enter the number of minutes in the Check-in Lead Time (Minutes) and Auto-Cancel Period (Minutes) field. This parameter is disabled if set to zero.
Once done, click on the Save Business Rules button.
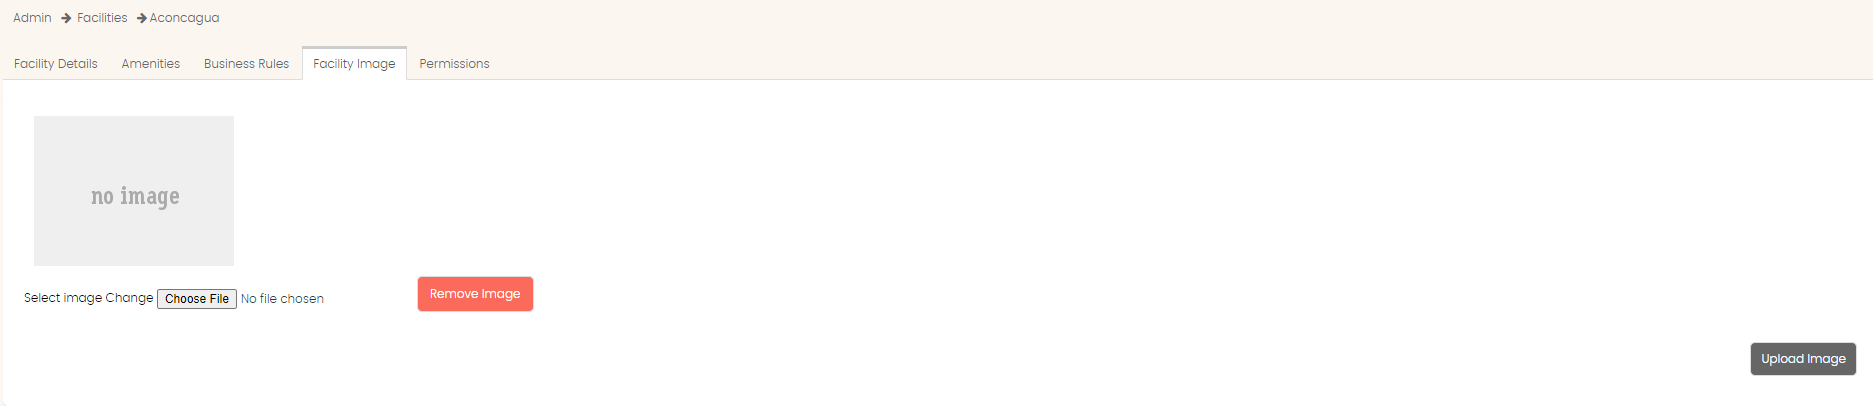
Room Image
Use the Choose File button to browse through your local computer to upload an image.
Once chosen, click the Upload Image button.
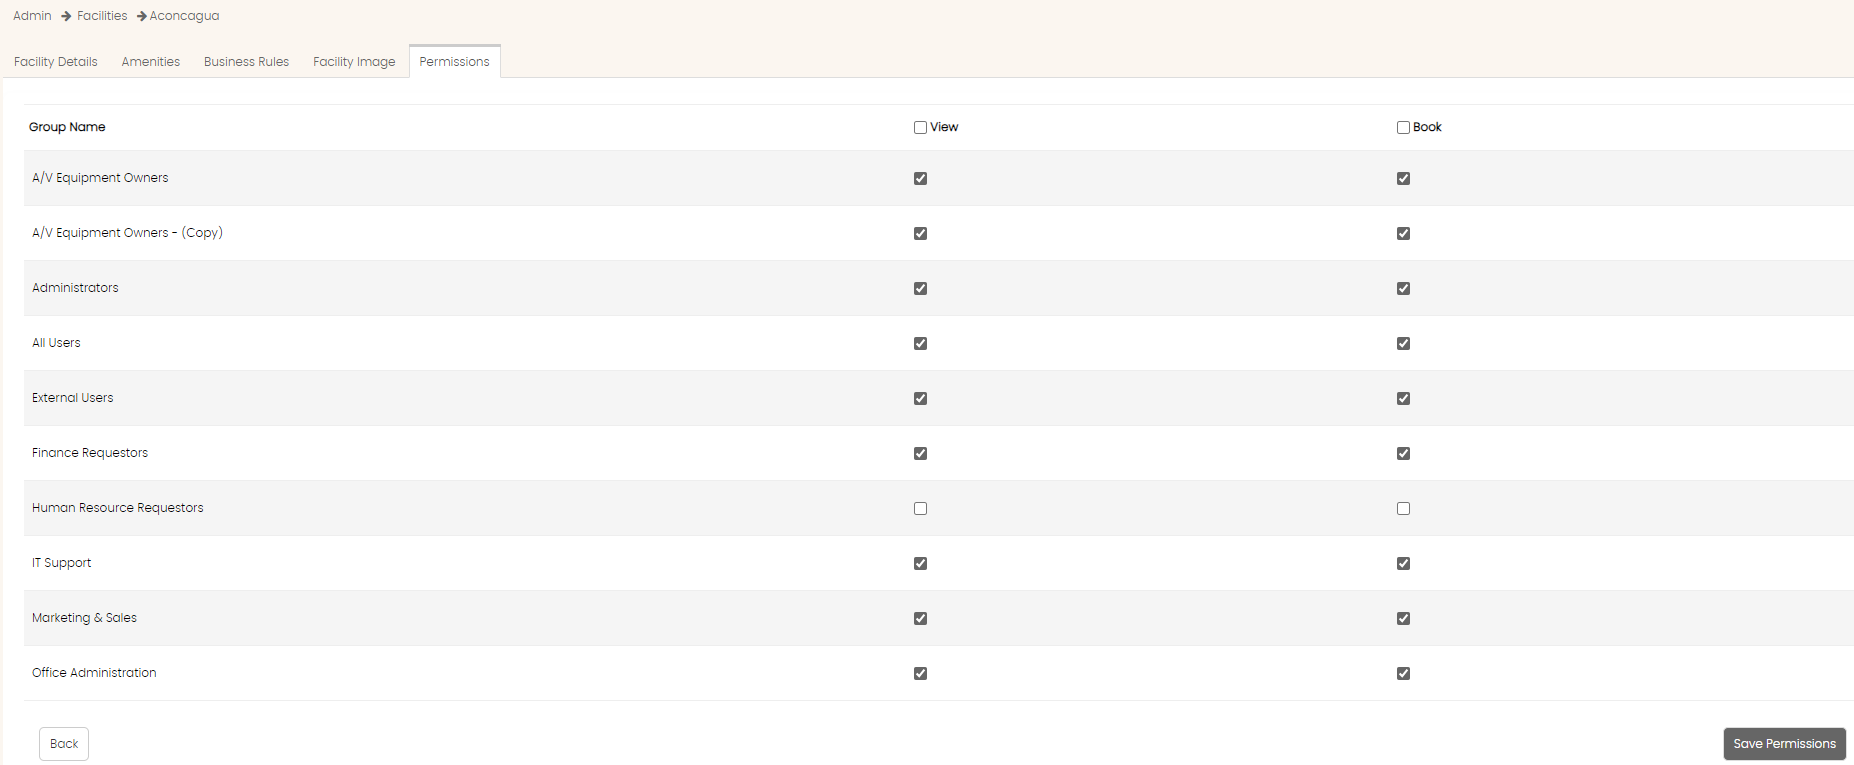
Permission Tab
Use the check boxes to determine which group has visibility into this facility by setting the View and Book options.
Once done, click on the Save Permissions button.
Created with the Personal Edition of HelpNDoc: Maximize Your Productivity with a Help Authoring Tool